How Custom Apps Work...


Zoomadog Web-Based Content Management Server

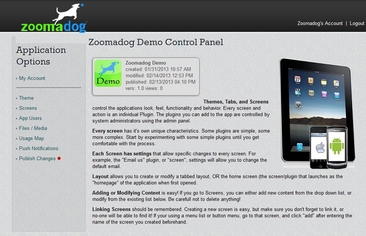
The Content Management Server (CMS) provides an easy way to manage the content you want delivered to your mobile community.  When your order is placed, we register your new application with Google Play and Apple App stores and you'll be assigned a User and Password to access the CMS server. Once you log in, you can manage your account info, Upload Files and proceed to the "Screens" section.  Here you'll have 16 different templates that can be used with your Mobile App. Each temple will have sample data loaded to help get you started. This means you'll be able to immediately see how it works on your Mobile device. Key or copy and paste your data into each template to create your content. If you need to use pictures, simply proceed to the File Manager and upload your files. Try to keep the picture size under 75K as the larger the picture size, the longer it takes to download. You can use any picture with any template that accepts images. As you enter data for each template, you can press the [Save] button to save your data.  When you have finished updating your content, simply select the Publish link and your content is sent Immediately.  Your company data will be available to view on all mobile devices. This process typically takes less than an hour to enter your data, upload pictures and set up the templates to get you up and running...but it's very intuitive and easy to use.
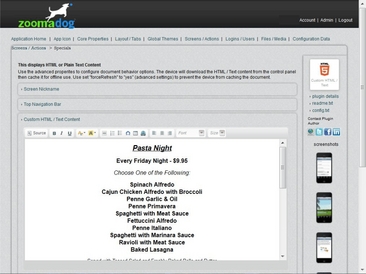
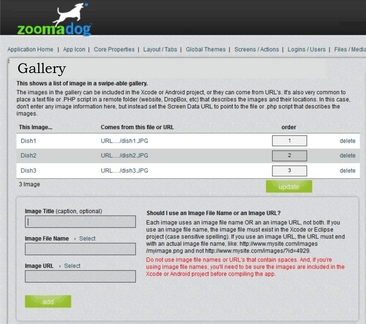
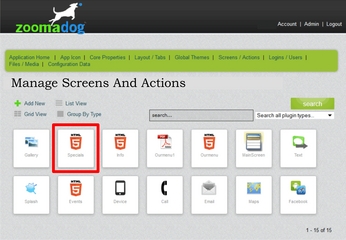

Below 
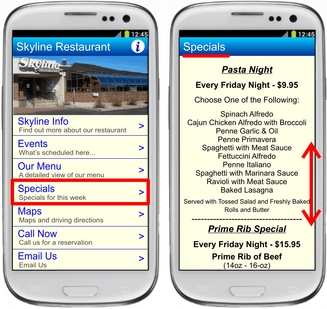
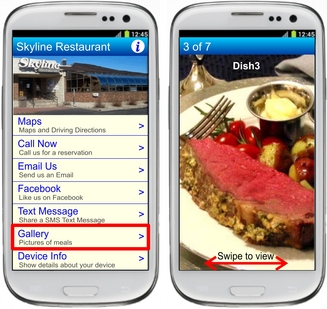
are sample screens that show how the CMS system works and how content is displayed on any mobile device. Your custom Mobile App has all the CMS templates pre-loaded.  When you log into the CMS Server, you just have to decide which ones to use. Since we have many different business Apps, for this example, we are showing the "Zoomadog for Restaurants" application.  As you can see, each template matches a template in your App.  Simply select the template and update your content.


1) When you login to the CMS Server, you will see the screen below. You will have a few options to manage your account and your business content.  The first thing to do, is select the "Screens / Actions" menu on the left.  This brings you to the screen on the right where you can manage your content.


3) When the Specials HTML function is selected, you will see the screen below. There are various options provided to manage your data. We'll start by selecting the HTML Editor. Now move your mouse to the editor and key in your data or simply copy and paste from your PC and press the [Save] button, and then select the Publish link to send your data.


5) The Maps function allows you to key in your business address and display this in Google Maps. The Server will automatically find your location and enter the Latitude and Longitude data. Select the color of your Pin and press the [Save] button. The next screen will allow you to select background colors, menu title, show user's location or allow for showing directions.  These are very powerful tools.  If you have a navigator program loaded on your phone, it will ask you if you want to use this to guide you to this business address.  If no navigator is loaded, Google maps will show text directions for you follow. Note, this assumes your device has GPS, if not it will just display a message that your location can't be found.


7) The CMS File/Manager allows you to upload documents or pictures to the Server. Once your pictures are uploaded, you can use the Gallery template to display them to your mobile users. It's very easy to use, you simply enter your picture title and select the image you want to load. After you've entered all your pictures, you can enter a number sequence to determine the order they are viewed. Press the [Update] button and these pictures are now available for all to see.


2) The "Manage Screens And Actions" section shows each of the mobile templates that have been built into your custom application. Each of these have some sample data loaded. For example, select the "Specials" function to edit the data by filling out the screen prompts.


4) Download your App on your mobile phone and run it.  The App will display "Updates Available".  Press "Yes" and select the "Specials" menu item on your screen. Presto! The Specials screen is displayed with the data you just keyed in... all in real time. The screen is automatically resized... simply swipe up or down to view all the data.


6) When the you run your App, the Maps selection will be displayed on the main menu (shown below left).  Touching the Maps function opens the Google Maps screen (shown below right) with your business location (green pin) and the mobile user location (phone icon). If you press the green pin, the App will ask if you want directiions from the mobile user to the business location.  Pressing Yes, loads a navigator program (if you have one loaded) or shows you the Google Maps text directions.   


8) The Gallery template is selected from the main menu. When selected, the Gallery screen is open and the first picture is displayed. The picture number is shown at the top along with the total pictures available. Use your finger to swipe through each picture to view each one. by turning your phone to the side, all pictures will be displayed in landscape mode.  As you add more pictures, they are automatically updated and pushed to each mobile user.